Linux实战
OpenEuler安装
下载VirtualBox虚拟机

在浏览器官网搜索virtualBox官网Oracle VirtualBox然后直接下载即可
打开VirtualBox后发现并没有操作系统(),那么我们就再去浏览器下载openEuler操作系统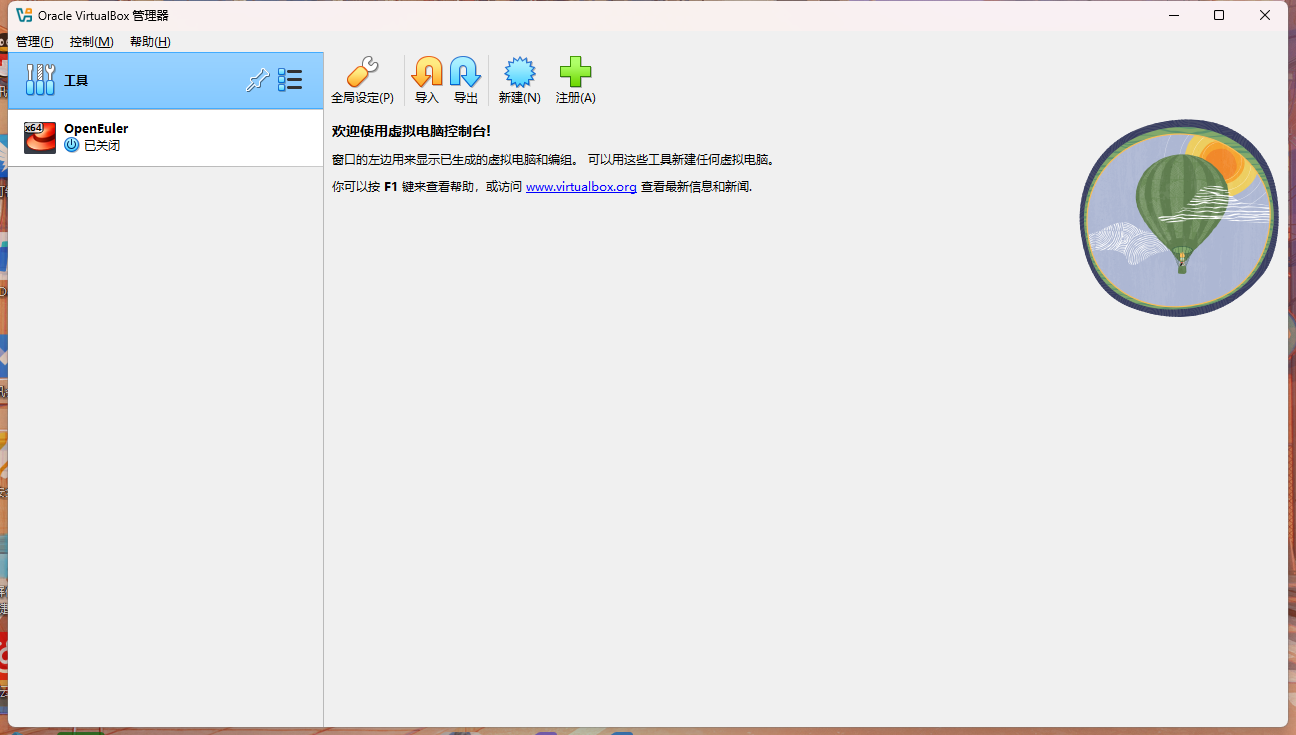
下载OpenEuler操作系统
在浏览器上搜索OpenEuler社区openEuler | 开源社区 | openEuler社区官网
点开后找到Offline Everything ISO,下载就好了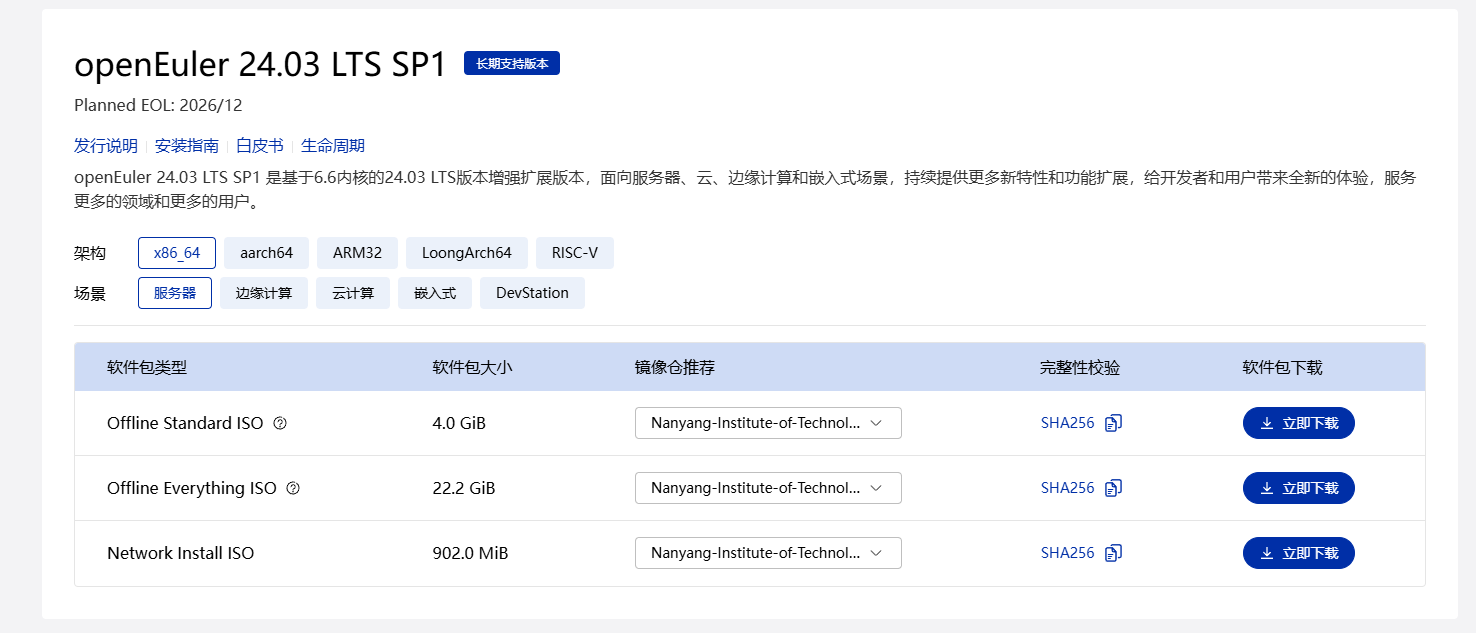
事实上并没有删除()
在VirtualBox中加载OpenEuler
点击注册,然后按照下图配置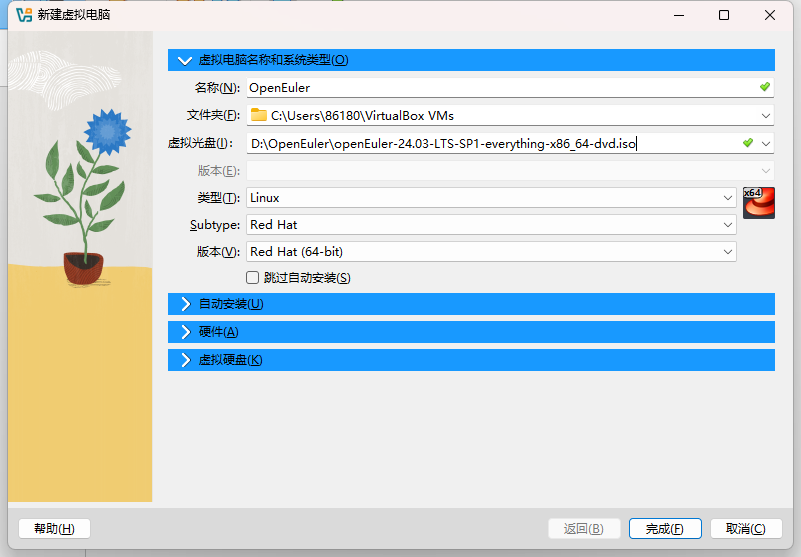
然后新建虚拟电脑的时候配置一下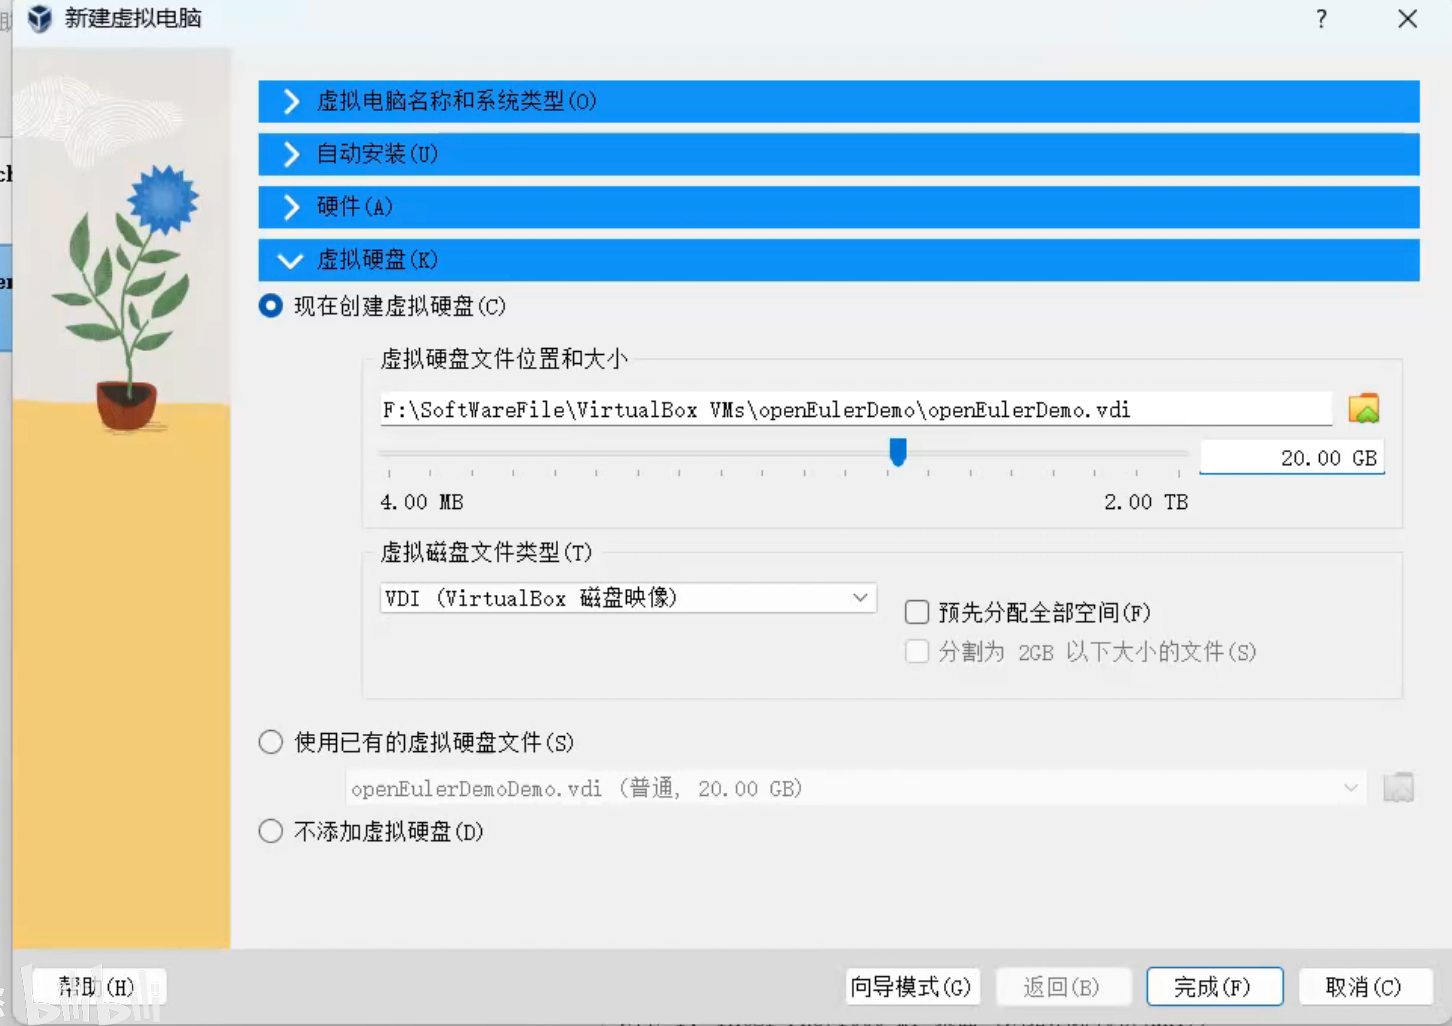
全都配置好就可以使用了
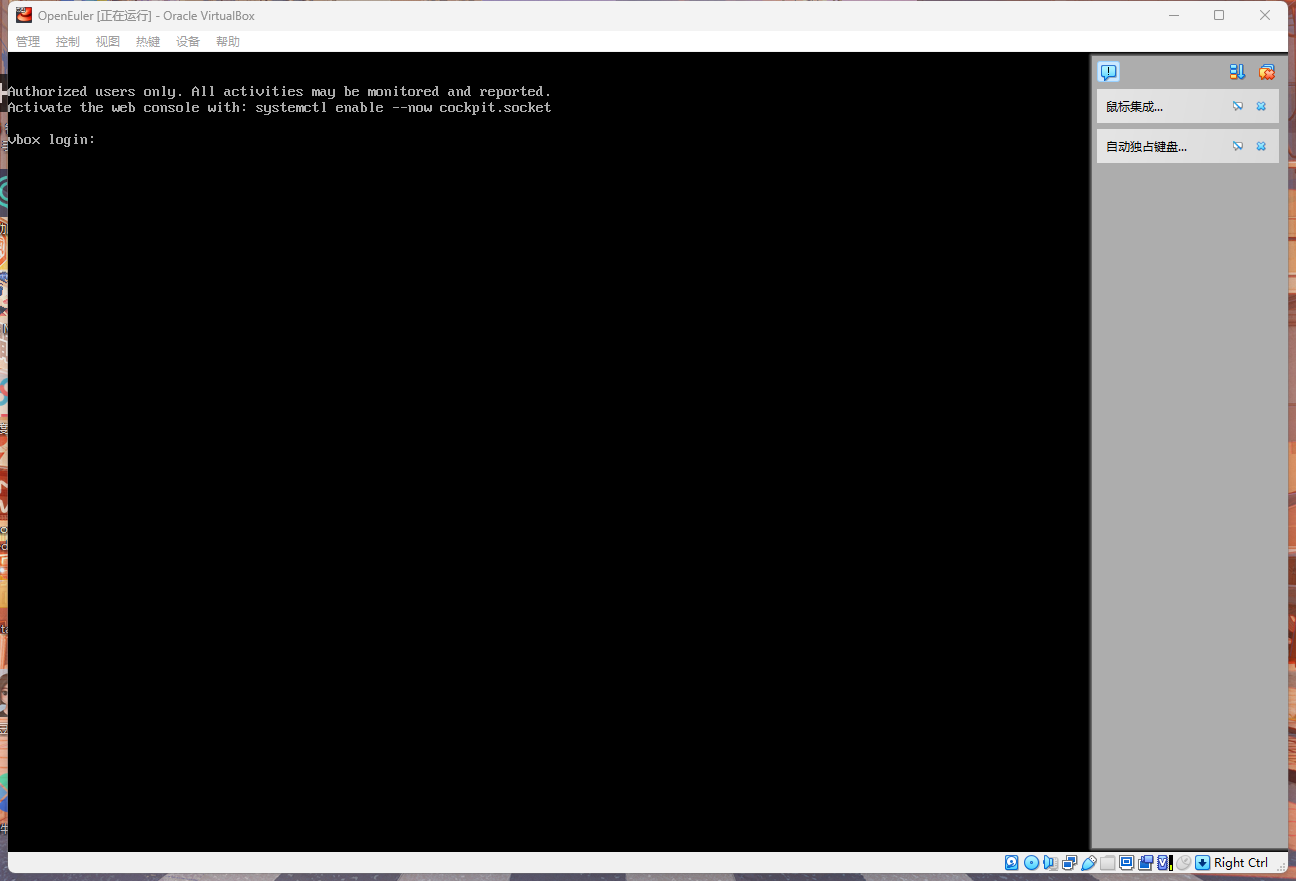
注意!!!一定要记住自己的root密码
OpenEuler实践报告
一、实验环境
- 操作系统:OpenEuler(通过VirtualBox虚拟机运行)
- 编译器:GCC
二、作业要求的代码
例1:
 1
 2
 3
 4
 5
 6
 7
 8
 9
10
11
12
|
#include <stdio.h>
#include <sys/types.h>
#include <unistd.h>

int main()
{
    fork();
    fork();
    fork();
    printf("hello\n");
    return 0;
}
|
例2:
 1
 2
 3
 4
 5
 6
 7
 8
 9
10
11
12
13
14
15
16
17
18
19
20
|
#include <stdio.h>
#include <stdlib.h>
#include <sys/types.h>
#include <unistd.h>

int main()
{
    int x = 1;
    pid_t p = fork();
    if(p < 0){
        perror("fork fail");
        exit(1);
    }
    else if (p == 0)
        printf("Child has x = %d\n", ++x);
    else
        printf("Parent has x = %d\n", --x);

    return 0;
}
|
例题一操作
-
创建文件并输入代码:
将例1的代码复制到文件中,保存并退出。
-
编译代码:
1
|
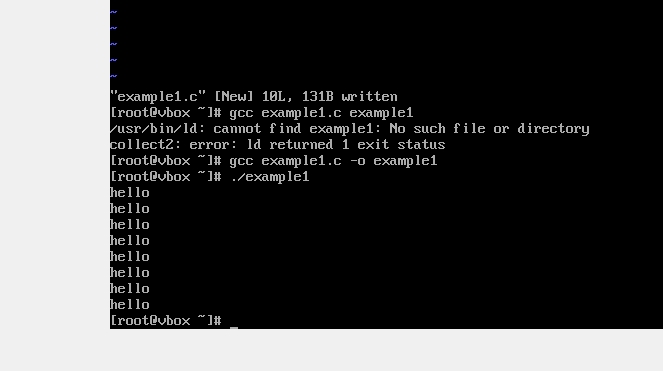
gcc example1.c -o example1
|
如果没有错误,将生成可执行文件example1。
-
运行程序:
观察输出结果。
运行结果及分析
例1运行结果:
1
2
3
4
5
6
7
8
|
hello
hello
hello
hello
hello
hello
hello
hello
|
例一分析: 每次fork()调用都会创建一个新的进程,三次fork()会创建8个进程(2^3),每个进程都会执行printf("hello\n");,所以输出8次"hello"。
例题二操作
-
创建文件并输入代码:
将例1的代码复制到文件中,保存并退出。
-
编译代码:
1
|
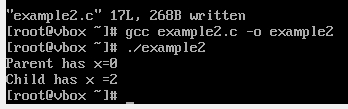
gcc example2.c -o example2
|
如果没有错误,将生成可执行文件example1。
-
运行程序:
观察输出结果。
运行结果及分析
例2运行结果:
例二分析:
- 父进程和子进程各自拥有变量
x的独立副本。
- 子进程中
x的值被递增(++x),所以输出2。
- 父进程中
x的值被递减(--x),所以输出0。
五、总结
通过本次实践,我掌握了在Linux环境下使用GCC编译C代码的基本流程,理解了fork()系统调用的原理和用法,以及进程控制的基本概念。同时,也熟悉了在OpenEuler操作系统下的开发环境和工具的使用。
HW3-多线程-git
1. 编写和编译多线程代码
1.1 创建代码文件
在Linux命令行中,使用vi或nano编辑器创建一个名为pthread_hello.c的文件:
编写如下代码
 1
 2
 3
 4
 5
 6
 7
 8
 9
10
11
12
13
14
15
16
17
18
19
20
21
22
23
24
25
26
27
|
#include <pthread.h>
#include <stdio.h>

/* Thread function that prints "Hello World" */
void *worker(void *arg)
{
    printf("Hello World!\n");
    return NULL;  /* Thread exits (dies) */
}

int main()
{
    pthread_t thread;
    int ret;

    /* Create a new thread */
    ret = pthread_create(&thread, NULL, worker, NULL);
    if (ret != 0) {
        perror("pthread_create failed");
        return 1;
    }

    /* Wait for the thread to finish */
    pthread_join(thread, NULL);

    return 0;
}
|
1.2 编译代码
使用gcc编译代码,并链接pthread库:
1
|
gcc pthread_hello.c -o pthread_hello -lpthread
|
1.3 运行程序
运行编译后的程序:
输出结果为:
Hello World!

2. 使用Git管理项目
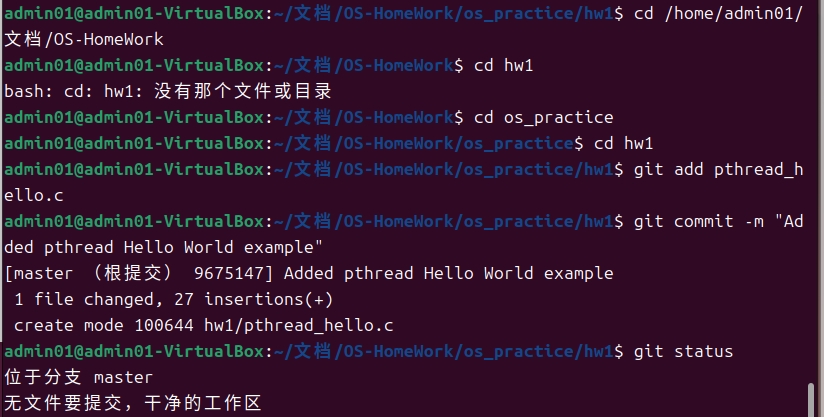
2.1 创建项目目录
在主目录下创建一个名为os_practice的项目目录:
1
2
|
mkdir os_practice
cd os_practice
|
2.2 初始化Git仓库
初始化Git仓库:
2.3 创建子目录
为每次的实践创建单独的子目录,例如:
将pthread_hello.c文件复制到该目录下:
2.4 添加文件到Git
将文件添加到Git仓库:
1
|
git add pthread_hello.c
|
2.5 提交更改
提交更改并添加描述信息:
1
|
git commit -m "Added pthread Hello World example"
|
2.6 检查Git状态
检查当前Git仓库的状态:
提交代码至github
在github中注册好之后,创建代码仓库
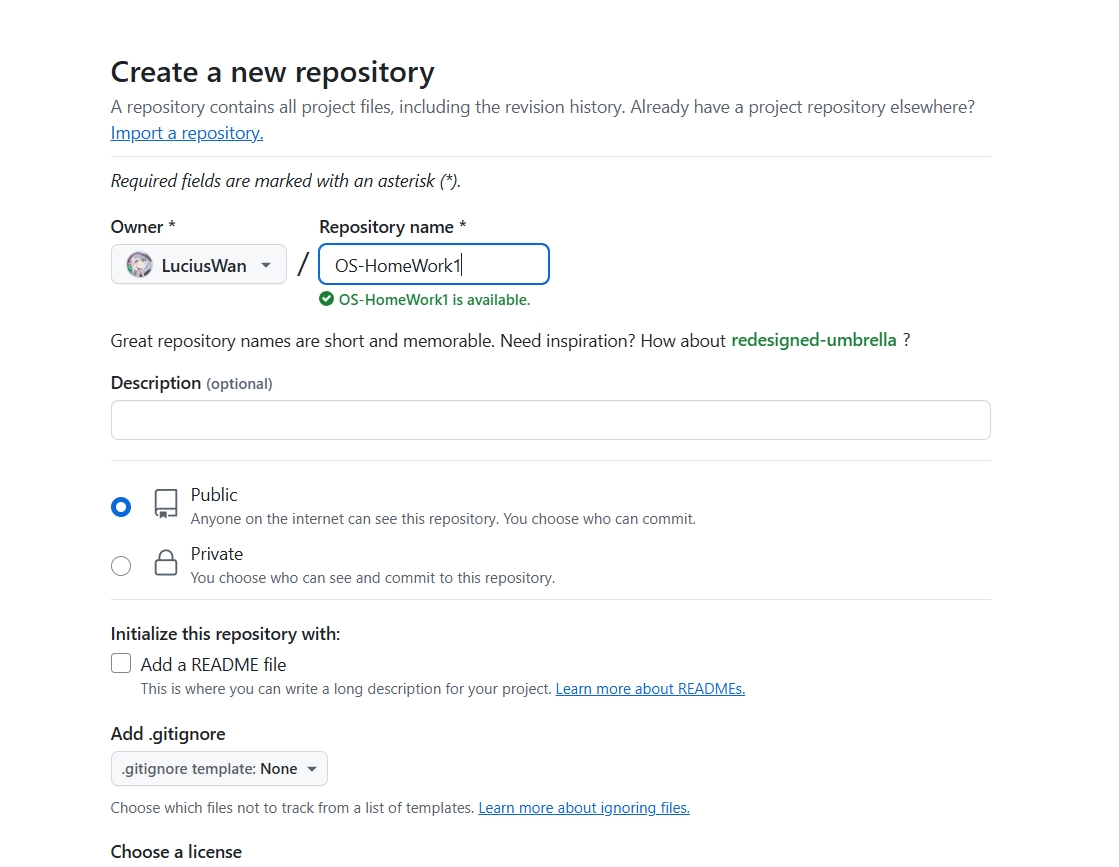
创建好之后,使用github给的bash代码
1
2
3
4
5
6
7
|
echo "# OS-HomeWork" >> README.md
git init
git add README.md
git commit -m "first commit"
git branch -M main
git remote add origin https://github.com/LuciusWan/OS-HomeWork.git
git push -u origin main
|
然后本地仓库就和github连上了.
我们可以在本地编译,提交代码至github仓库
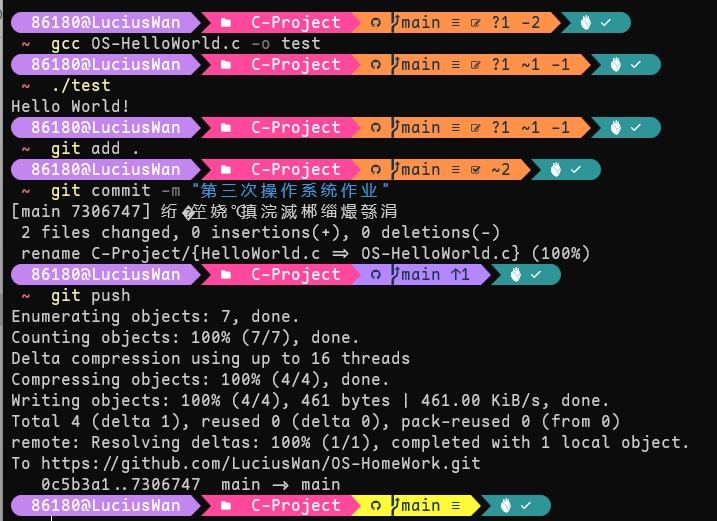
分别使用下面bash语句
1
2
3
|
git add .
git commit -m "update"
git push
|
git add .
将当前工作区中的所有更改(包括新文件、修改的文件和删除的文件)添加到 Git 的暂存区
git commit -m “update”
将暂存区中的更改正式提交到本地仓库,并添加一条提交信息。
-
提交(commit)是 Git 的一个快照,记录了当前暂存区中的所有更改。
-
-m "update" 是提交信息,用来描述这次提交的内容或目的。
-
提交信息是可选的,但强烈建议添加,以便以后能够清楚地了解每次提交的更改内容。
git push
很好理解,把本地仓库修改内容和修改信息一并推送到远程仓库
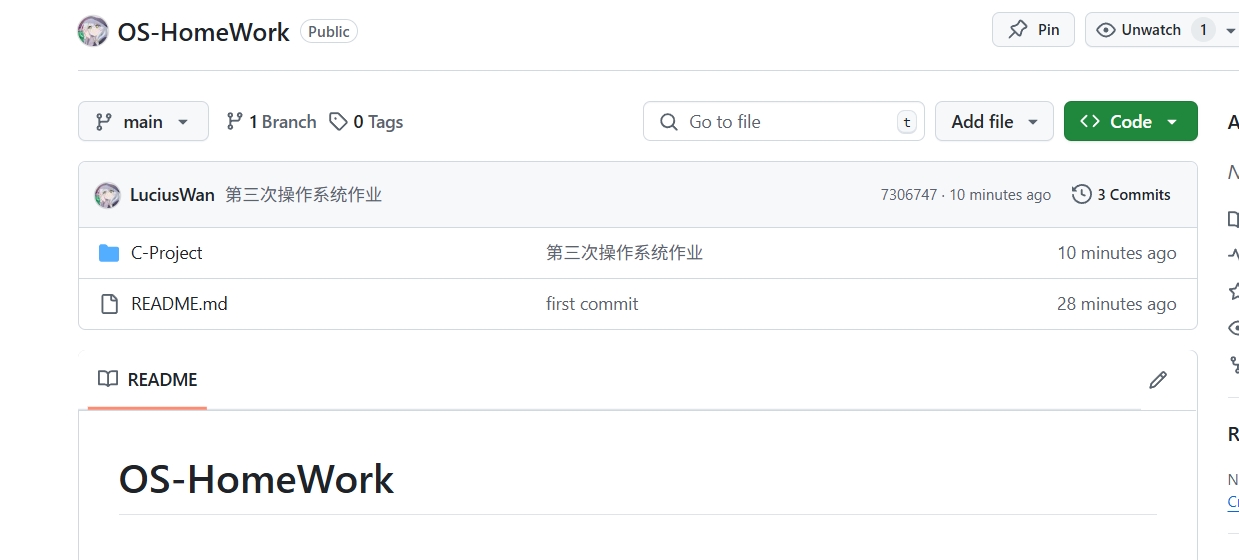
提交后,我们的仓库就会发生变化
OS第一次上机课
作业内容如下
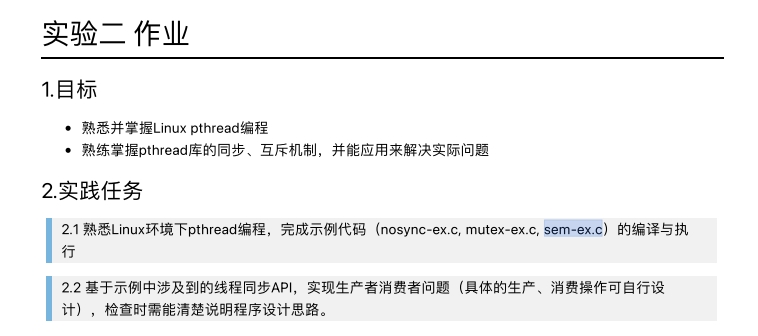
任务二
编写nosync-ex.c文件
代码如下
1
2
3
4
5
6
7
8
9
10
11
12
13
14
15
16
17
18
19
|
#include <stdio.h>
#include <pthread.h>
int sum = 0;
void *thread(void*) {
int i;
for (i = 0; i < 1000000; i++)
sum += 1;
}
int main(void) {
pthread_t tid1, tid2;
pthread_create(&tid1, NULL, thread, NULL);
pthread_create(&tid2, NULL, thread, NULL);
pthread_join(tid1, NULL);
pthread_join(tid2, NULL);
printf("1000000 + 1000000 = %d\n", sum);
return (0);
}
|
这种情况下不上锁,线程之间互相抢资源,导致线程错误,最终结果错误
结果如下:
1
2
3
|
admin01@admin01-VirtualBox:~/文档/OS-ClassHomework$ vim nosync-ex.c
admin01@admin01-VirtualBox:~/文档/OS-ClassHomework$ gcc nosync-ex.c -o nosync-exadmin01@admin01-VirtualBox:~/文档/OS-ClassHomework$ ./nosync-ex
1000000 + 1000000 = 1172208
|
编写mutex-ex.c文件
代码如下
 1
 2
 3
 4
 5
 6
 7
 8
 9
10
11
12
13
14
15
16
17
18
19
20
21
22
23
24
25
|
#include <stdio.h>
#include <pthread.h>
int sum = 0;
pthread_mutex_t mutex;
void *thread(void*) {
int i;
for (i = 0; i < 1000000; i++) {
pthread_mutex_lock(&mutex);
sum += 1;
pthread_mutex_unlock(&mutex);
}
}
int main(void) {
pthread_t tid1, tid2;
pthread_mutex_init(&mutex, NULL);
pthread_create(&tid1, NULL, thread, NULL);
pthread_create(&tid2, NULL, thread, NULL);
pthread_join(tid1, NULL);
pthread_join(tid2, NULL);
printf("1000000 + 1000000 = %d\n", sum);
return (0);
}
|
这种情况下可以上锁,线程之间只能有一个能使用锁资源,保证了线程安全,结果正确
结果如下
1
2
3
4
|
admin01@admin01-VirtualBox:~/文档/OS-ClassHomework$ vim mutex-ex.c
admin01@admin01-VirtualBox:~/文档/OS-ClassHomework$ gcc mutex-ex.c -o mutex-ex
admin01@admin01-VirtualBox:~/文档/OS-ClassHomework$ ./mutex-ex
1000000 + 1000000 = 2000000
|
编写sem-ex.c文件
代码如下
 1
 2
 3
 4
 5
 6
 7
 8
 9
10
11
12
13
14
15
16
17
18
19
20
21
22
23
24
25
26
|
#include <stdio.h>
#include <pthread.h>
#include <semaphore.h>
int sum = 0;
sem_t sem;
void *thread(void*) {
int i;
for (i = 0; i < 1000000; i++) {
sem_wait(&sem);
sum += 1;
sem_post(&sem);
}
}
int main(void) {
pthread_t tid1, tid2;
sem_init(&sem, 0, 1);
pthread_create(&tid1, NULL, thread, NULL);
pthread_create(&tid2, NULL, thread, NULL);
pthread_join(tid1, NULL);
pthread_join(tid2, NULL);
printf("1000000 + 1000000 = %d\n", sum);
return (0);
}
|
信号量可以通过其操作原语(如 sem_wait() 和 sem_post())实现互斥访问,这里使用了信号量保证了线程安全,结果正确
1
2
3
4
|
admin01@admin01-VirtualBox:~/文档/OS-ClassHomework$ vim sem-ex.c
admin01@admin01-VirtualBox:~/文档/OS-ClassHomework$ gcc sem-ex.c -o sem-ex
admin01@admin01-VirtualBox:~/文档/OS-ClassHomework$ ./sem-ex
1000000 + 1000000 = 2000000
|
任务三
编写生产者消费者问题
生产者消费者问题是一个消息队列,实现了异步处理,可以达到削峰填谷的作用
代码实现
 1
 2
 3
 4
 5
 6
 7
 8
 9
10
11
12
13
14
15
16
17
18
19
20
21
22
23
24
25
26
27
28
29
30
31
32
33
34
35
36
37
38
39
40
41
42
43
44
45
46
47
48
49
50
51
52
53
54
55
56
57
|
#include <stdio.h>
#include <stdlib.h>
#include <pthread.h>
#define BUFFER_SIZE 5
#define NUM_ITEMS 10
int buffer[BUFFER_SIZE];
int count = 0; // 当前缓冲区中的元素数量
int in = 0, out = 0;
pthread_mutex_t mutex = PTHREAD_MUTEX_INITIALIZER;
pthread_cond_t full = PTHREAD_COND_INITIALIZER;
pthread_cond_t empty = PTHREAD_COND_INITIALIZER;
void* producer(void* arg) {
for (int i = 0; i < NUM_ITEMS; i++) {
pthread_mutex_lock(&mutex);
while (count == BUFFER_SIZE) {
pthread_cond_wait(&full, &mutex); // 等待缓冲区不满
}
buffer[in] = i;
printf("Produced: %d at position %d\n", i, in);
in = (in + 1) % BUFFER_SIZE;
count++;
pthread_cond_signal(&empty); // 通知消费者
pthread_mutex_unlock(&mutex);
}
return NULL;
}
void* consumer(void* arg) {
for (int i = 0; i < NUM_ITEMS; i++) {
pthread_mutex_lock(&mutex);
while (count == 0) {
pthread_cond_wait(&empty, &mutex); // 等待缓冲区不空
}
int item = buffer[out];
printf("Consumed: %d from position %d\n", item, out);
out = (out + 1) % BUFFER_SIZE;
count--;
pthread_cond_signal(&full); // 通知生产者
pthread_mutex_unlock(&mutex);
}
return NULL;
}
int main() {
pthread_t prod, cons;
pthread_create(&prod, NULL, producer, NULL);
pthread_create(&cons, NULL, consumer, NULL);
pthread_join(prod, NULL);
pthread_join(cons, NULL);
return 0;
}
|
运行结果如下
1
2
3
4
5
6
7
8
9
10
11
12
13
14
15
16
17
18
19
20
21
22
|
admin01@admin01-VirtualBox:~/文档/OS-ClassHomework$ gcc MesssageQueue.c -o MessageQueue
admin01@admin01-VirtualBox:~/文档/OS-ClassHomework$ ./MessageQueue
Produced: 0 at position 0
Produced: 1 at position 1
Produced: 2 at position 2
Produced: 3 at position 3
Produced: 4 at position 4
Consumed: 0 from position 0
Consumed: 1 from position 1
Consumed: 2 from position 2
Consumed: 3 from position 3
Consumed: 4 from position 4
Produced: 5 at position 0
Produced: 6 at position 1
Produced: 7 at position 2
Produced: 8 at position 3
Produced: 9 at position 4
Consumed: 5 from position 0
Consumed: 6 from position 1
Consumed: 7 from position 2
Consumed: 8 from position 3
Consumed: 9 from position 4
|
消息队列的容量上限为5个item,因此当生产者获取消息队列资源后给这个资源上锁,只有生产者可以向里面写入数据,可以看到从0-4一共五个数被填入消息队列,然后由于队列已满,通知消费者读取数据,消费者读取了0-4的数据后由于消息队列中没有元素,消费者释放锁资源,并且通知生产者可以生产数据,生产者继续生产5-9的数据,队列又满,通知消费者读取,最后完成所有数据的生产消费,进程结束.
Git提交代码
使用命令,把所有文件提交到工作区
然后使用命令提交代码
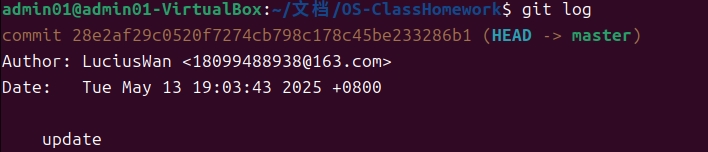
查看提交记录
结果如下
提交成功